
5

 |
 |
5 |
 |


|
The LA Fox Developer Newsletter
January
995
Time Trakker
[Con't from page 4]
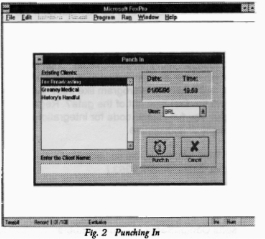
developer’s initials or designation (available from a
user’s picklist), and clicking on the punch-in icon.
“Punching out” is just as simple a task and pro-
vides you with a memo field to either make notes
on the entry or to charge against a certain project
task. (We’re also using
Microsoft Project v4.O
to
track each finite task in the project.)
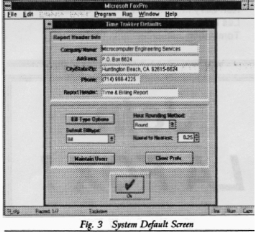
Accuracy and client preferences regarding how
they are billed (1/4-hour increments, 1/2-hour
increments, etc.) are two aspects of this type of
time-and-billing application that Time Trakker
handles with ease through the system default
screens. (See Fig. 3)
Basically, you punch-in and punch out against specific
clients and Time Trakker handles the rest.
Reporting, probably the most important aspect of this
type of application, is one of Time Trakker’s strengths.
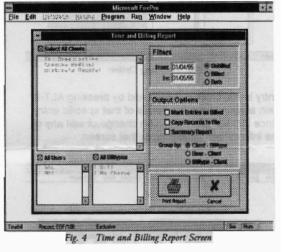
You may select all or any number of clients to report
against for a specific period, all or any number of
users to report, billed/unbilled/both (or any categories
you create), select any number of output options,
grouped by client-bill type, user-client, or bill type-
client. (See Fig. 4) You’re also given a choice of
printing detailed or summary reports.
Outputting the reports is also a snap. The user is
given four basic choices for report formats. (Let’s
also not forget about third party add-ins you may
already have, such as R&R or FoxFire.) Choices
include outputting to the pnnter(whith results in a very
attractive report if you have a laser printer), print
preview, outputting to the screen (which results in a
DOS-type output), or outputting to a file. (See Fig. 5,
next page.)
“Browse Entries” opens up a typical FoxPro BROWSE
screen (See Fig. 6). Browsing the enthes gives you a
quick overview of what’s been billed and what billable
hours are still outstanding. (Notice the last three lines
of the browse screen.) You may also highlight an
[Con’t, page 6]
Page
S
|
 |
 |
5 |
 |